Wednesday, October 5, 2011

More LM8UU


Continuing with the linear bearing upgrade, my next print after getting the Y-axis all linear bearing-ified (and the rocket shot glass test) was Greg's X-carriage for LM8UU's. I actually stopped the print a few layers early because I found the little towers that contain the bearings had a tendency to snap off when trying to insert the bearing on the Y-axis holders and weren't really necessary once the zip-ties were in place anyway.
New LM8UU X-carriage a la Greg Frost
Mounted and ready to go

It works great and the integrated tensioning device is a brilliant feature. Thanks Greg!

So I'm running out of excuses not try printing with ABS. The main reason I want to do so is in order to make myself an extra extruder cold end in case something goes drastically wrong and I end up wrecking mine. That, and I find the regular Wade's setup a pain to deal with both in terms of the idler holder and the fact that one mounting screw is buried under the motor which has two mounting screws hidden behind the large gear. Can you guess which extruder I want to make?

I got some of the usual glass bead 100k thermistors in so I can use one for testing the glass HBP. If I can get it up to temperature and it works well for PLA and ABS, I'll consider modifying the RAMPS thermistor circuit to accommodate my relatively low resistance written thermistor on the glass. Maybe I can just use another of the analog inputs.

Thursday, September 22, 2011

Better, Faster, Stronger...

Over time my Y-axis in particular has gotten more and more troublesome. I was using PLA bushing holders and bronze bushings. When aligned well it worked great but the tolerance was very tight and the slightest change in the rods caused the bushings to bind. I made the mistake of trying to lubricate the setup with some white grease I had for my bicycle, and it worked initially, but eventually it seemed to thicken up and made it worse overall. So I cleaned up the rods and used some light machine oil that at least got me back to where I was before the bike grease blunder.

My copy of Digifab's LM8UU holders
I had ordered some LM8UU linear bearings a while back and finally, about three weeks after the order, the boat from China my new bearings. This was definitely the time for an upgrade. There are several options for bearing holders available on thingiverse, but I chose Digifab's bearing holder because of the provision for cable ties, and the ability to access the attachment screws with the bearing in place. I crossed my fingers through the whole print as the Y-axis had started skipping steps recently. The holders printed out fine and I started making up a new bed using a scrap piece of smoked plexiglass.

Old bronze bushing plate and new LM8UU plate
I decided to go with just the three bearings and I have to say it worked out very well. I was initially concerned because there seemed to be quite a bit of play with just one bearing on the rod, but once all three were mounted to the plate and in place on the machine, it was fantastic just to feel how smooth the movement was and with no noticeable slop.

Fully installed bottom plate with LM8UU bearings
I also decided to try using just three leveling screws instead of the usual four partly because the new holders didn't leave much room near two of the corners of the plate, and partly because I found trying to level four points to be annoying as one always seemed to be loose. I still haven't decided if I like it better or not. Need some more experience to really know whether I want to stick with it.

I used the cable tie trick to tension the Y-axis belt and it worked great. Thanks to whoever posted that on thingiverse (nophead I think). Once I got the belt on, the amount of resistance to movement with the plate increased dramatically. Way more than could be attributed to just the stepper. The only potential source of friction I could see now was where the belt rubs the fender washers next to the 608 bearings. I loosened the nuts holding the fender washers and the resistance dropped significantly. I had no idea the side of the belt could create that much friction from slight misalignment with the bearing. So I moved my bearings a bit and tightened it all back down again and the plate movement was much better.

Printed off a quick rocket shot glass and I have to say I'm completely happy with the new Y-carriage. The walls are much smoother and more consistent. Time to do something about the X-carriage.


Thursday, September 15, 2011

HBP Testing and New Filament

First the good news. I finally did some testing with my prototype glass heated build plate and was able to successfully get to a usable temperature for ABS. I first tried to test it by laying it on a piece of G10 which my current build platform is made from and hooking it up to a suitable ATX power supply. After 15 to 20 minutes, I wasn't able to crack 90°C. My first thought was that this was an issue with the heating conductor since we kind of missed the mark a little on the conductor trace and ended up with too high resistance. But while cleaning up from the test, I quickly realized another possible issue when I felt how warm the G10 had gotten.

For the next test I decided to put the plate on a sandwich of cardboard and foil tape. This worked much better and I was able to reach a decent temperature fairly quickly. I also took some shots of the plate with the IR camera at work during the test to try to get an idea of the heat distribution. I don't think that worked out like I had hoped. I'm fairly sure the camera was seeing through the glass to the heating element and cardboard below. But even though the pictures might not be an accurate representation of the heat on the surface, measurement with a thermocouple showed the top surface to be right where I needed it. And if my calculations are correct this is only using about 6.6 amps from a cold start, and somewhat less once it's warmed up. This is just on a 130x150mm plate, so a larger plate will require proportionally higher current.

Unfortunately, I'm not sure our idea for the thermistor will work out. I didn't know how the arduino was measuring resistance until I did a little research, and with my limited experience in electrical engineering (nearly none), it didn't occur to me that the amount of resistance we were getting out of the thermistor trace on the plate would be difficult to work with. The arduino with RAMPS is doing a voltage comparison by creating a divider on a 5V circuit with a 4.7k resistor on one side and the thermistor on the other. The typical thermistor is 100k and has a really huge swing in resistance which works great with the 10 bit resolution of the analog inputs. But my thermistor only vaies from 230 to 290 Ohms over the temperature range I'm interested in which isn't enough. I could swap out the 4.7k resistor for something close to the value of the thermistor, but I'd rather not mess with the board, and I'm not sure what affect the increased current (~50mW by my calculations) would have on the arduino board. So I think I'll just tape a 100k unit to the top of the board for now.

I ordered some new filament from Ultimachine. So far I had only used some samples of black, green, and silver PLA from Ultimachine (it's not chocolate, but you can get a few Octopuses/i/odes out of it) and a pound of natural PLA from MakerGear. All of those had worked really well and I had no qualms about ordering more variety of plastic from Ultimachine. I got a pound each of the orange, blue, and silver PLA, and a pound of natural ABS in anticipation of having a usable HBP. I managed to print the small gears and pins of the screwless cube gears thing in natural PLA before I ran out. I thought I'd give the orange a try for the big gears. I took a caliper to the filament and got measurements all over the place, from 2.8 to 3.1mm. I also noticed that the texture of the plastic was significantly different from any other PLA I had tried. It seems much softer. This did not bode well, but I decided to give it a try anyway. It did not work. I did manage to get one successful 20mm calibration cube, but had issues with everything else. At first I though there was a problem with the extruder because the filament was stalling. I tried cranking up the heat thinking maybe it just wasn't melting as quick as the other stuff but that didn't help. I took apart the cold end to see if the hobbed bolt had gotten gummed up by chewing into the plastic, but it really wasn't bad. I tried really cranking in the idler bearing on the filament, and it helped a little, but not enough to get a decent print. My final conclusion is that the filament is just too big in spots to fit into the hot end smoothly. I changed over to the silver and it worked fine. I hope that I can trade in the orange, because it's not going to work for my machine.

I clearly need to blog more often so I don't feel like I'm writing a novella every time I decide to post. Next up, dealing with mechanical issues and some ideas for vertical X-axis design.

Friday, August 26, 2011

Glass Heated Build Platform

I finally got the prototype made. It came out really well and even though I have no idea how well it will work yet, visually I think it's great. I have some video of the writing process, but it took almost 30 minutes, so I need to do a bit of editing before I post it. Here are two shots of it right after writing the conductors and before baking:

Just after writing heater element
Both heater and thermistor elements
The first picture shows just the essential part, the heating element. It's about 2.2 Ohms overall so at 12 Volts that should use 5.5 Amps and dissipate 65 Watts. I think that will be enough for the 4"X5" piece of glass. The extra lines you see in the picture are actually just scratches in the X-Y stage.

The next picture shows the completed pattern which includes a very long thin looping conductor which ideally will work as a thermistor using the natural TCR (temperature coefficient of resistance) of the conductor. The higher the resistance, the better range I should get as a function of temperature, hence the need for long and thin. The resistance of the thermistor came out in the neighborhood of 230 Ohms. Once I can fire up and control the heater, I'll have to generate a lookup table to use in my firmware for bed temperature control.

After writing the conductors, the plate was fired for 3 hours at 850°C. Then I was able to solder wires to the conductor pads. I'd like to think of a better interconnect for the next version, but for the prototype, this will be fine.

Now I need to make myself a decent power supply out of one of the old ATX PC supplies I have lying around.

Unfortunately, this past week has not been all good for me on the 3D printing front. I was having a little trouble with backlash, mainly on the X-axis, and in the process of tightening the belt managed to pull off both of the bushing holders on the motor end, and two of the bushing holders from the X-carriage.
Bushing holder separation on X-axis

This is apparently a problem for more than a few people. I believe the belt went slack over time due to the motor mount being designed with a bit too little plastic. Eventually the belt tension pulled the pulley in enough to cause slack. I guess I got a little ham-handed trying to take up the slack and you can see some of the results. The cable tie I had on there was not enough to prevent the detachment of the bushings. Maybe it's me, but I think the desire to reduce the amount of plastic in the printer parts has gone a bit too far. I'm also at a loss to understand why the channel in the X-motor end and X-idler end faces away from the source of tension. I have a hard time believing there isn't a good reason for this orientation, but I'm damned if I can figure it out. I'm really impressed by the work I see on vertically oriented X-axis parts by Emmanuel and the Russians and I would like to do something similar once I get up and running again.

My goal with building the printer was to make parts for other projects, but I'm getting totally sucked in to the idea of improving the design.

Tuesday, August 23, 2011

The Best Laid Plans...

So much for the plan. Life events have made it a bit of a challenge to coordinate my schedule with that of the production team at work. So other than finding a time that I can actually make the test version of the glass HBP, I'm all ready to go. Here's a piece of the pattern that I'll be using for the first attempt (click to see it full size):

The lines represent the path that the Micropen will travel to lay down the conductor. The red path will be the heating element made with an overlapping 20mil line for a final line width of about 2mm. The blue trace will be a thermistor which will not overlap and be only 10mils wide and 550 inches long. I'll have to come up with a custom thermister table once I can test it out. I'm hopeful I'll actually be able to do this tomorrow or the next day.

Sadly, I haven't had much time for printing things lately. I managed to make half of the corners and the pins for a screwless cube gear, but the center is proving difficult for me to print in PLA as it's so small at the bottom that it's not cooling off quickly enough. I'm going to try printing it along with something else to see if that helps since I don't yet have a cooling fan on my x-carriage.

Wednesday, August 3, 2011

Plan for Glass Heated Build Platform

Example heater and thermistor on glass
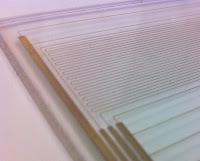
I've read many success stories of using glass on top of a heated build platform, and some struggles as well. Seems that if you can get the plastic to stick throughout the print, removal after cool down is easy. So I've decided to use glass as the top surface, but rather than go the traditional route and just lay it on top of the heater, I'm opting to actually create the heater on the glass surface. I've mentioned previously that the company I work for makes resistors (including heaters and thermistors) on all sorts of substrate materials and shapes including glass vessels. The electrical elements are made by Micropenning the conductive ink onto the surface then baking.  So making a heater and thermistor on a flat square of glass should be easy.

The point of doing it this way for me is to ensure that the glass is very evenly heated since I won't have to worry about even contact with the surface beneath, and possibly to reduce the power requirements for the platform. Oh, and just because I can. I plan to create a test piece this coming week to check the uniformity of the heat distribution on the glass with my heater pattern, as well as to confirm my math on the electrical properties of the heating circuit. I'm not an electrical engineer, and I'm trying not to bother the experts at work too much (though they may say otherwise). I have a couple of nice pieces of scrap borosilicate glass to use from one of our previous projects. I may try standard tempered glass later if it proves out and I decide to make a few more.

RevK's 11&39 Wade's Gears
I tweaked my skeinforge settings a little more and printed out these fantastic gears by RevK. They really do print out very easily and they came out way better than I expected at this point. I think they'll go great on the Greg's Hinged Accessible Extruder I plan on printing once I can do ABS on my new HBP.

Sunday, July 24, 2011

Just some stuff I printed

It's been over a month since my last post, and even though I've printed a bunch of things I still don't understand Skeinforge very well. I managed to combine settings from a few posts on forums to get fairly reliable prints with PLA. Here's a few of the things I've made:
More octopodes
Shuriken refrigerator magnet

Octopodes or octopi, I like them both. But the thicker legs on the former are the way to go if you are printing with PLA.

My boys had to flight test the shuriken, hence the lack of pointy bits as you can see in the picture.

30mm and 20mm companion cube
The companion cubes were something I was dying to print since I say them on Thingiverse. The one on the right is my first attempt at the normal 20mm size. I believe I used a 0.25mm layer height, and it just didn't get enough of the detail that I was hoping for. Once I got more comfortable playing with settings in Skeinforge, I redid it scaled to 30mm with a 0.2mm layer height. Much better. I'll do it again when I get some nice gray ABS.

I decided to find something bigger on Thingiverse. I really like the way MakeALot's Bracelet V came out. Even though it's a very periodic, mathematical design, it still has a somewhat organic look.

Bracelet V
Invader Number 3
I also decided to try some earrings, and I'm not up to the caliber of what Schorhr can do, so I got the space invader things, scaled down invader number 3, printed it and drilled a hole in the hand (tentacle?) for the hardware. Big hit at the sci-fi get together my family went to.


New Z-axis Coupling
So enough of the toys already. I really wanted to make something useful. One of the problems that showed up early was that my Delrin z-axis couplers were apparently not as straight as I had hoped they would be. So I ended up with a bit of a wave in the vertical plane on all my prints. First I tried to fix it using the plastic tubing and threaded coupler method, but I couldn't get the coupler to hang on to the tubing. So then I tried nophead's Z coupling that still uses the tubing, but clamps the joint very nicely. It worked beautifully. My subsequent prints (including the 30mm companion cube) have been very straight.

Filament Spool and Mount 
The next useful thing I wanted to do was to make something to hold the filament. Until now I've just been sort of draping around one of the Z motors. Problem is, I have to then baby-sit the printer to make sure the filament doesn't get caught up on anything.

Redesigned Part of Spool Mount 
I really liked the design of randyy's filament spool but I needed to find a way to mount it to my printer since the spool mount was designed for a Makerbot printer. As usual, I was not the first person to want to do this, and reprapperMC had already figured out a solution I was happy with. Unfortunately, I didn't have enough threaded rod on the end of the Z motor mounts to fit this particular spool mount. So I took my first real foray into OpenSCAD and redesigned the necessary part to be thinner at the bottom, and to clear the smooth Z rod clamp. I also wanted to be able to easily swap out the spool in order to change colors or materials. So I made a block for the top of the mount rod that could recieve the hub that was originally designed to fit the laser-cut wood on the Makerbot machines. Took me a couple of tries to print right due to small size and ambient heat wave, but it works very well.
Block to Receive Spool Hub 
Original Spool Hub and New Block

My RepRap is now a self improving machine. My next big step is to make a heated bed. Fortunately, I work for a company that specializes in adding resistors and circuits to pretty much any type of object, so creating a heater and thermistor on a piece of glass will be a walk in the park. The mechanical part of adding it to the machine will be much more difficult for me.